

Because of an issue in Ledger devices, it is currently not possible to directly extract your Bitcoin wallet’s YPUB from it. As an alternative, there are two methods of getting Bitcoin YPUBs from Ledger wallets using Electrum.
- Method 1: Using Electrum executable file (easier).
- Method 2: Using Electrum python installer (more difficult).
Both these methods give the same result.
Method 1: Using Electrum executable file (easier)
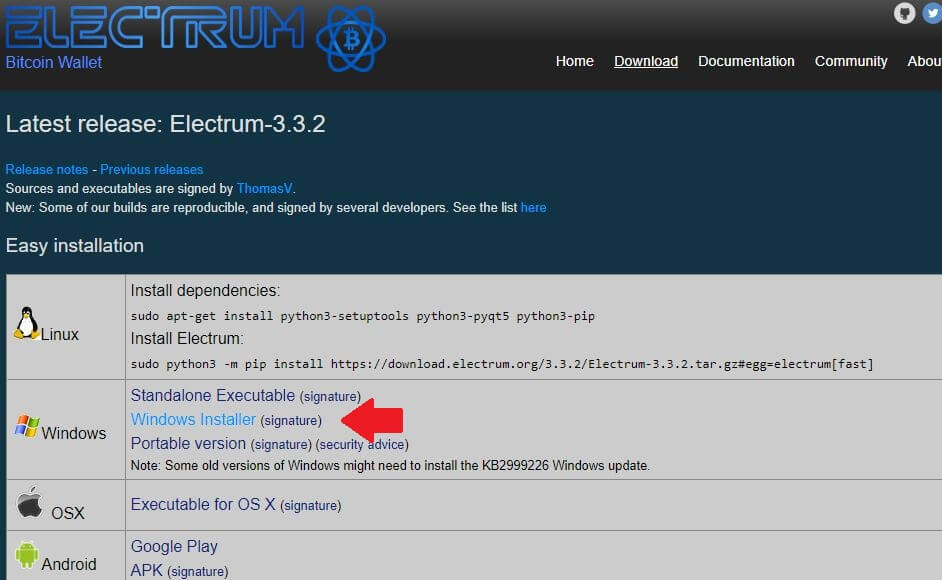
Step 1: Download Electrum from this link and install.
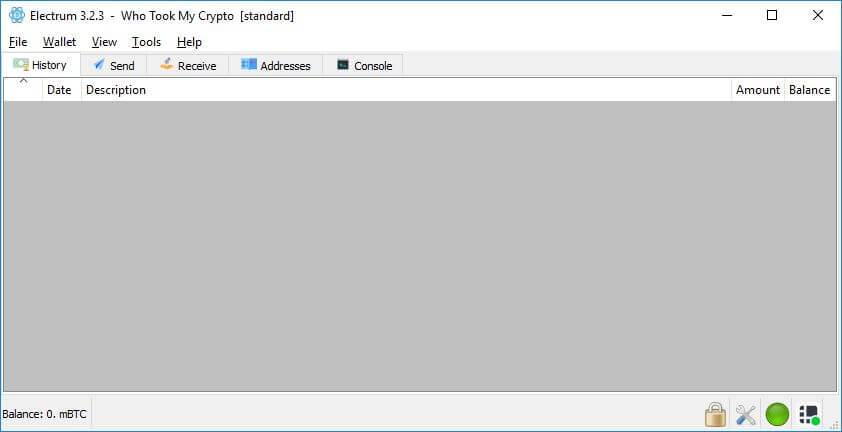
Step 2: Run Electrum.
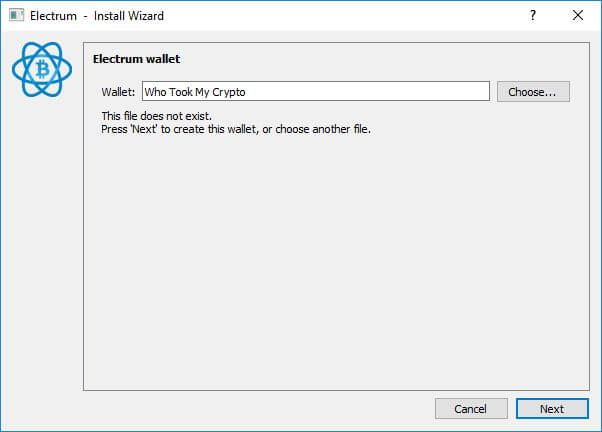
Step 3: Name your wallet.
Step 4: Select Standard wallet.

Step 5: Connect your Ledger wallet and enter the pin on your device. If you do not do this, Electrum would not be able to detect your Ledger wallet.
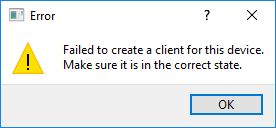
Step 6: Upon seeing this screen, open the Bitcoin app on your Ledger device. If you do not do this, you would get an error message saying “Failed to create a client for this device. Make sure it is in the correct state.”

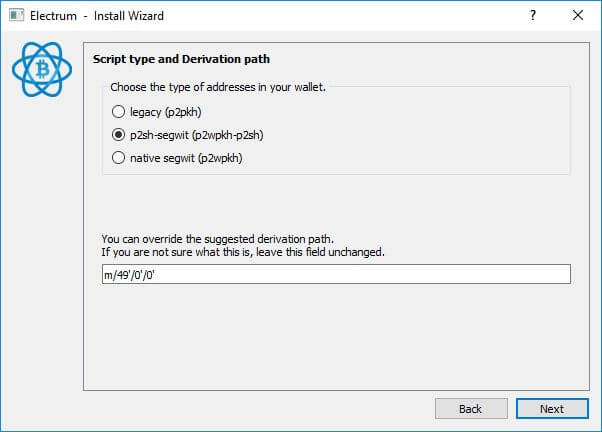
Step 7: Use the table below to determine which address structure you have.
| Address Type | Wallet Type | Extended Public Key | Address Format |
|---|---|---|---|
| Legacy Bitcoin | Legacy wallet | XPUB | Begins with 1 |
| P2SH-P2WPKH | SegWit wallet | YPUB | Begins with 3 |
| P2WPKH | SegWit wallet | ZPUB | Begins with bc1 |
For example, if your addresses start with 3 then you would be selecting the second option (p2sh-segwit) in the screenshot below.
Step 8: Determine whether you want to encrypt your wallet file.

Step 9: Your new wallet has been set up.
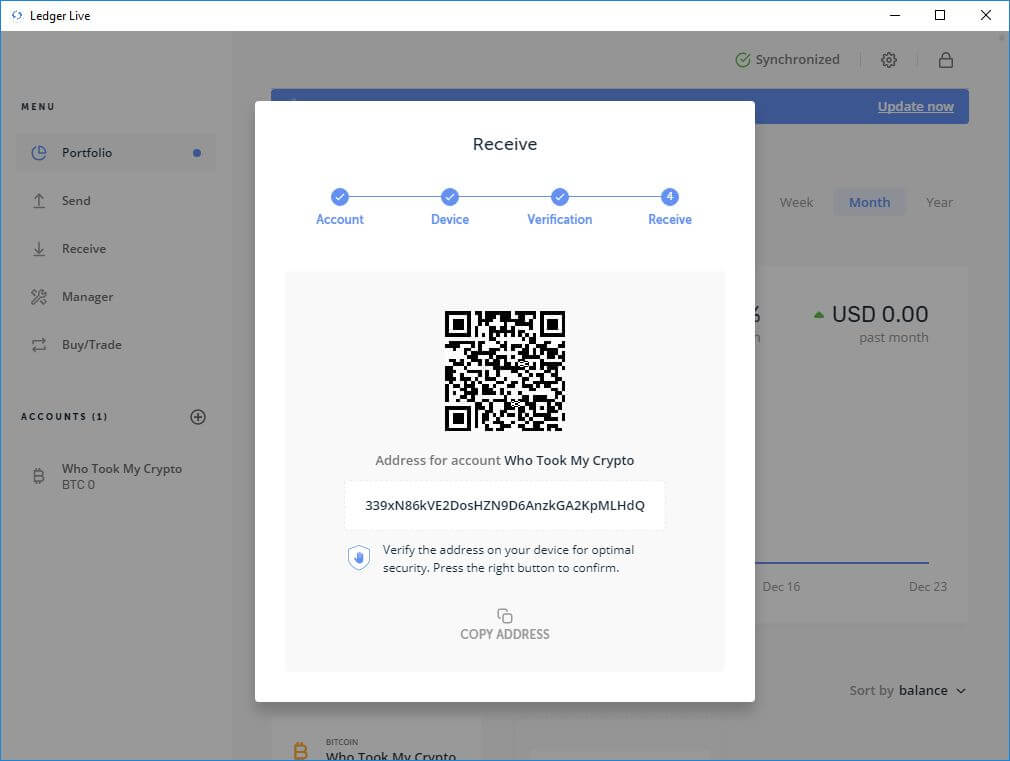
Step 10: Go to your Addresses view and check that the first address is similar to that shown in Ledger Live. If they agree, then you are good to go. This step assumes you have not carried out any transactions in Ledger. If you have done so, this verification can still be performed. However, the current address shown in Ledger would not be the first address listed in the Address section of Electrum. If the Addresses section is not showing, go to View > Show Addresses.
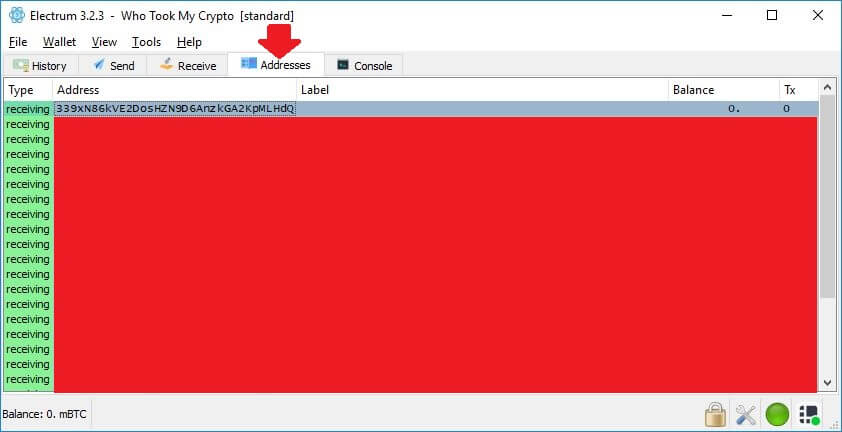
The address above ties to what is shown in our Ledger Live screenshot below.
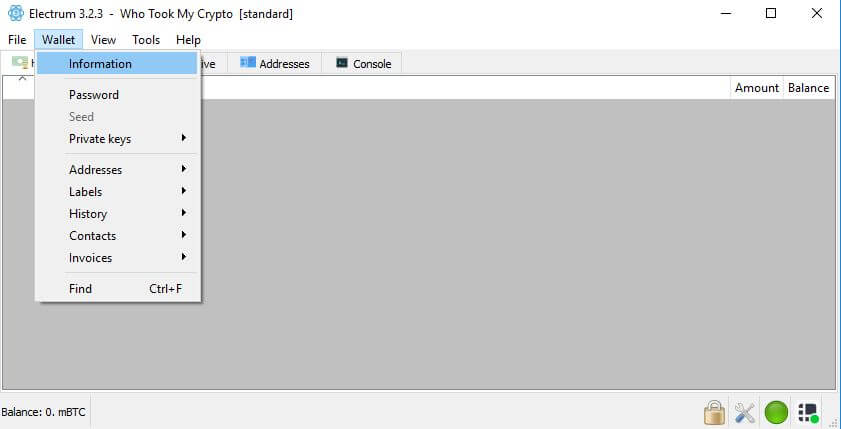
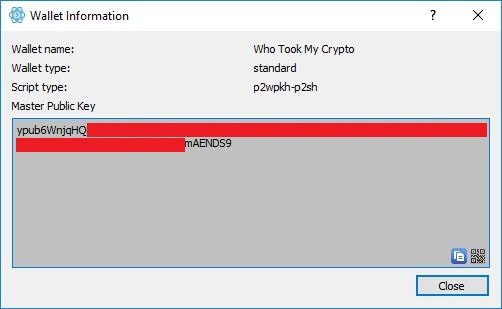
Step 11: Go to Wallet > Information.
Step 12: Your YPUB appears in the box.
Method 2: Using Electrum Python installer (more difficult)
Note: We have assumed you already extracted your XPUB. If not, refer to the deterministic wallet section of this article.
Installing Python
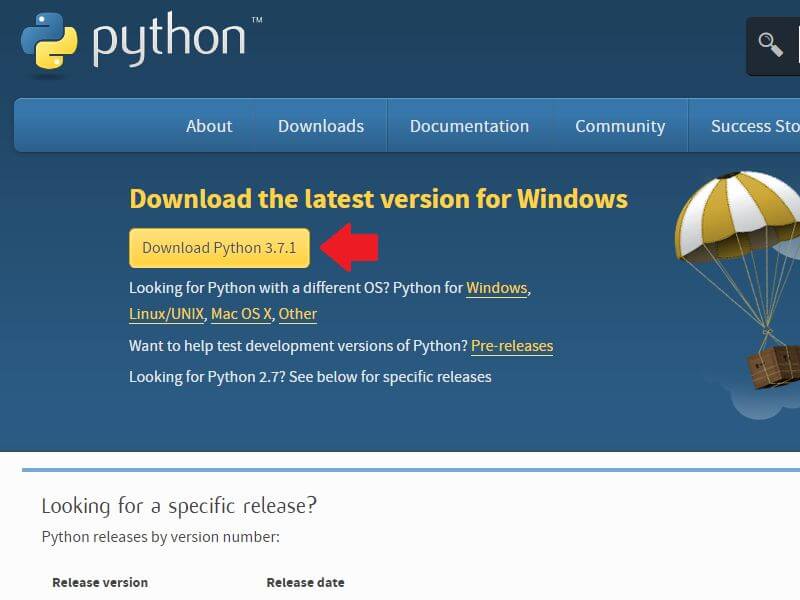
Step 1: Download the latest version of Python here.
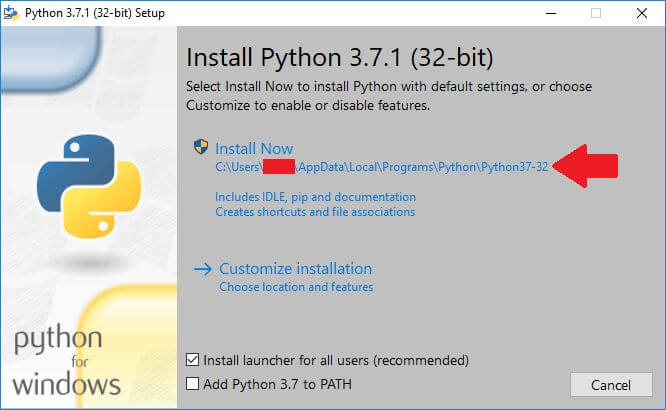
Step 2: Run the file to install Python. Take note of the location you are installing Python into.

Configuring Windows
Next, we need to ensure Windows can recognize the pip function.
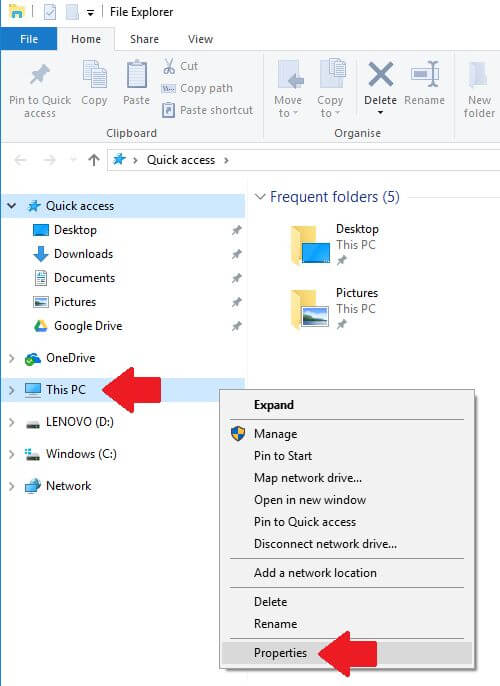
Step 3: Press the Windows button together with the letter E. This opens up the File Explorer.
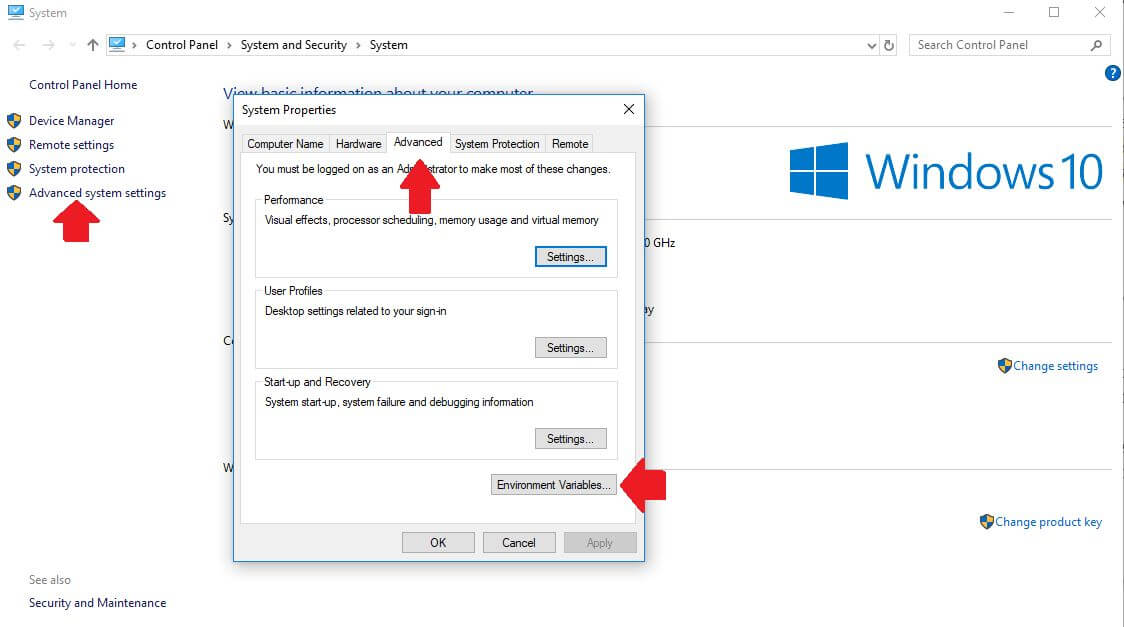
Step 4: Right-click on This PC and select Properties.
Step 5: In the new window that opens, select Advanced System Settings. A System Properties window would pop up. Select Environment Variables there.
Step 6: In the Environment Variables window that opens, select Path in the System Variables section and select Edit.

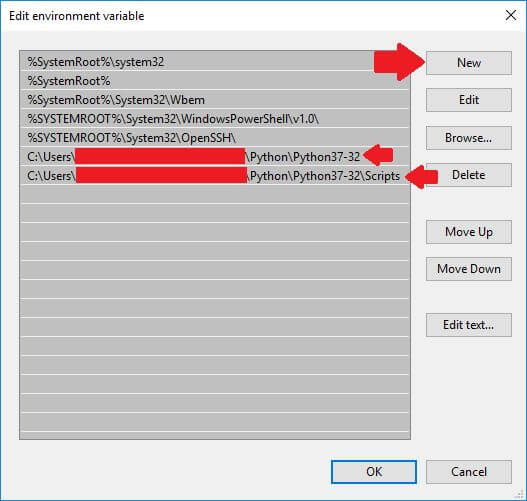
Step 7: The Edit Environment Variable view shows up. Remember the location of where you installed Python in Step 2? This is where it comes in. Select Newand insert the address to the main directory of Python and the Scripts directory.
Step 8: Close all windows by pressing OK.
Installing relevant Python packages
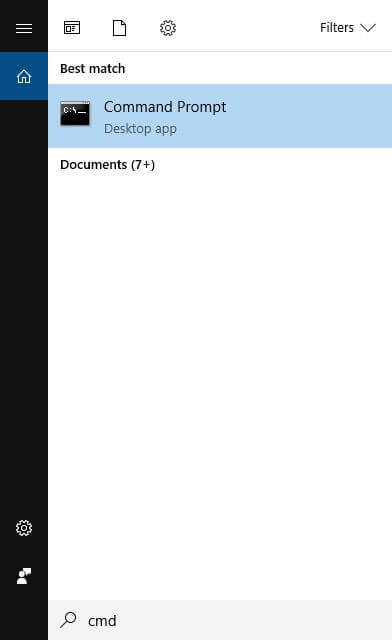
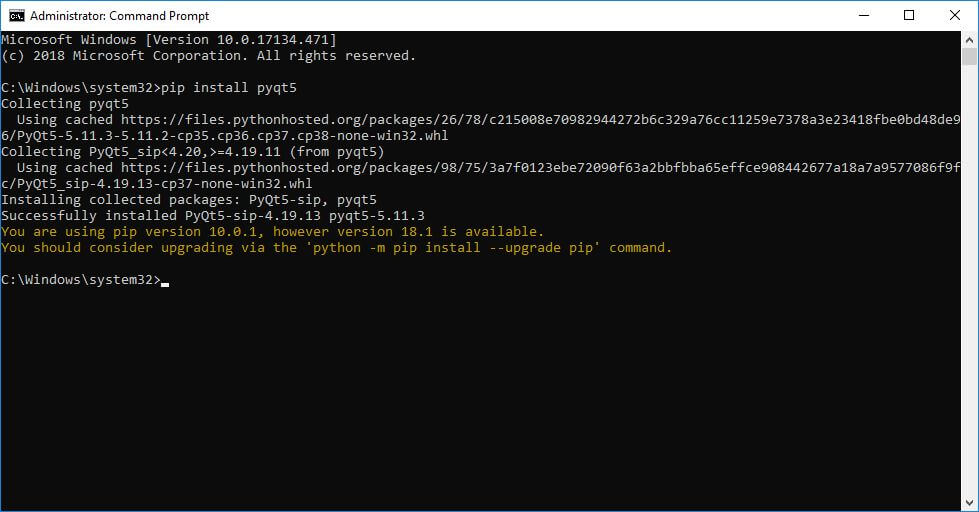
Step 9: Select the Windows button and type in cmd. The Command Prompt should appear.
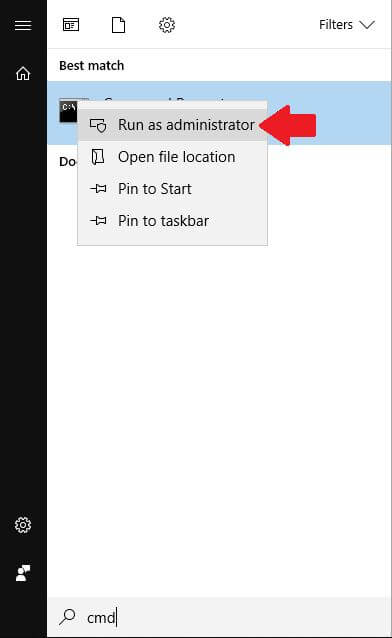
Step 10: Right-click on Command Prompt and select Run as Administrator.
Step 11: In the Command Prompt, type in pip install pyqt5 and hit Enter.
Downloading Electrum
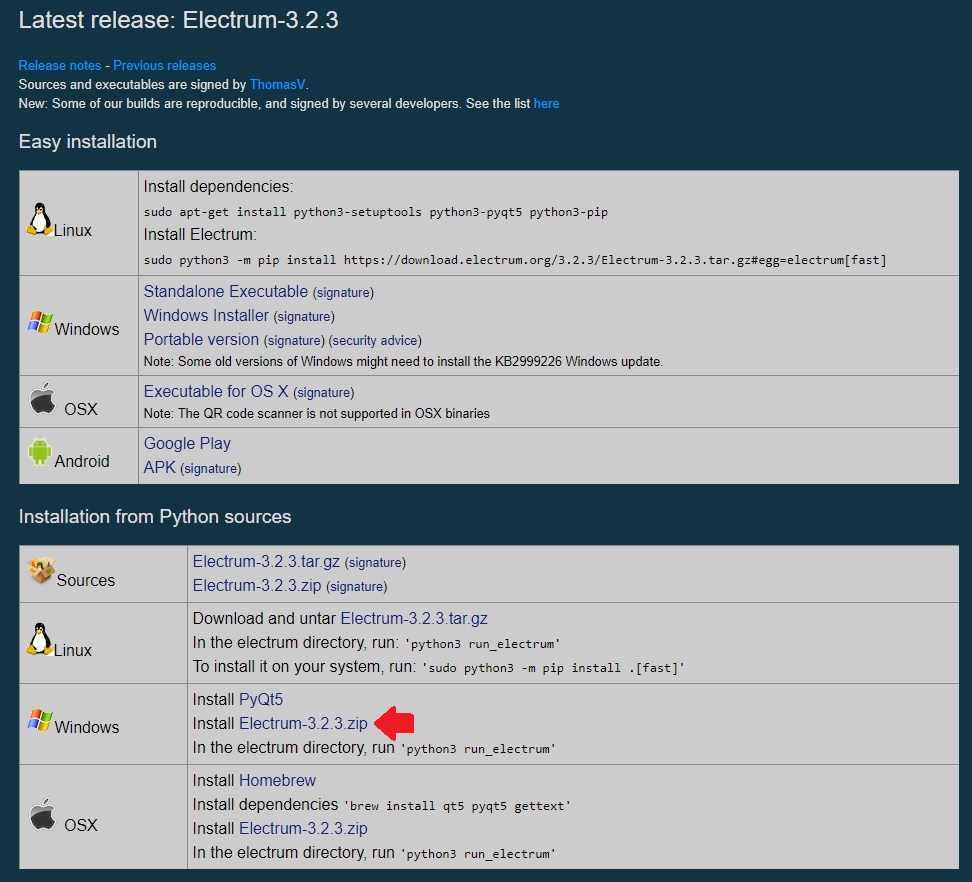
Step 12: Download Electrum from this link. You should download the version under the header “Installation from Python sources”.
Step 13: Unzip the file. For us, we have unzipped it onto the desktop for convenience.
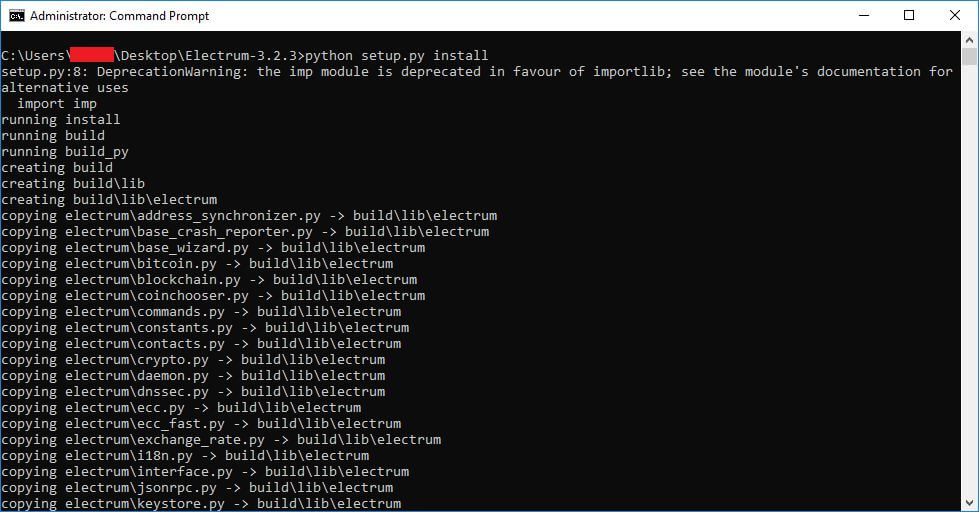
Step 14: In your Command Prompt, navigate to the folder you have unzipped Electrum in and type in python setup.py install and hit Enter.
Downloading python script for conversion
We would now download the script that allows us to convert XPUB to YPUB.
Step 15: Download this python script.

Step 16: Unzip the file. For us, we have unzipped it onto the desktop for convenience.
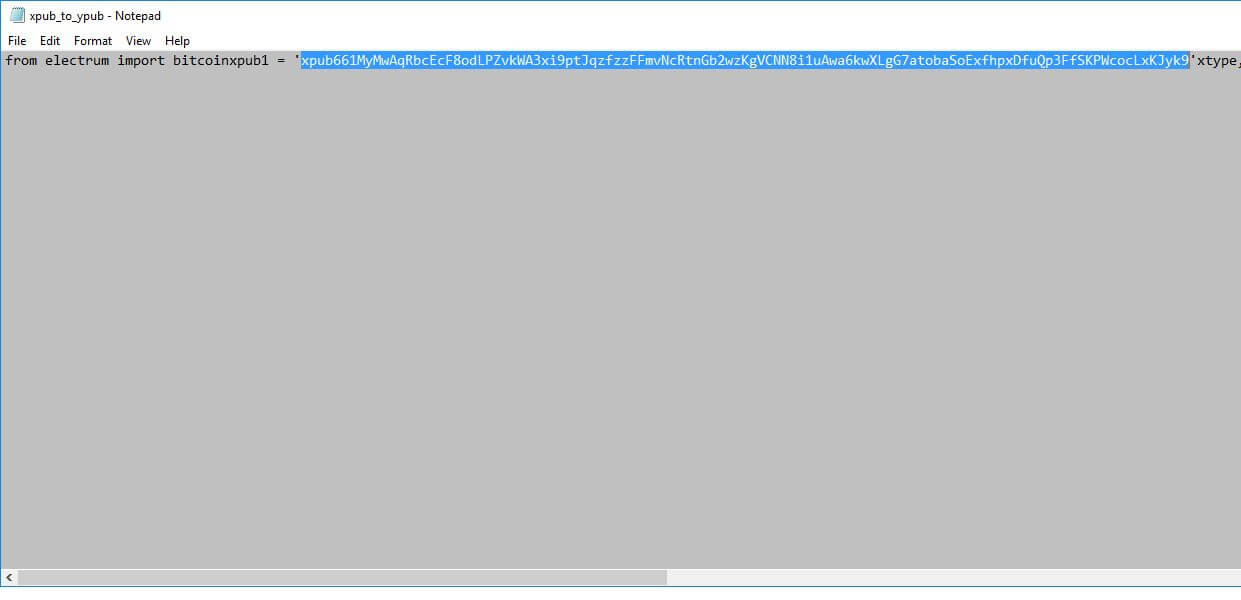
Step 17: Open the file with Notepad. Replace the highlighted portion below with your XPUB.
Converting XPUB to YPUB
Step 18: Go back to your Command Prompt. As per Step 9 and 10.
Step 19: Navigate to your desktop (or wherever you saved the python script for conversion).
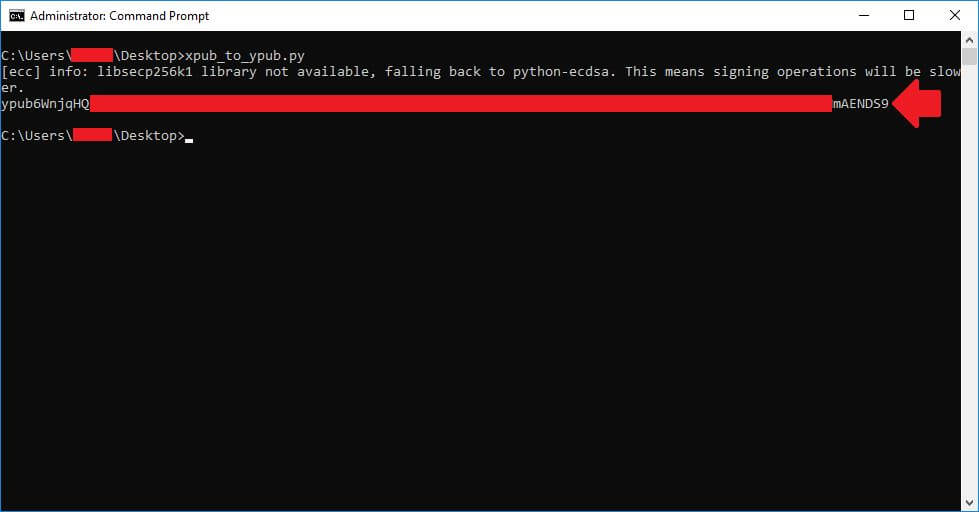
Step 20: Type in xpub_to_ypub.py and hit Enter. Your YPUB code should appear.
Troubleshooting
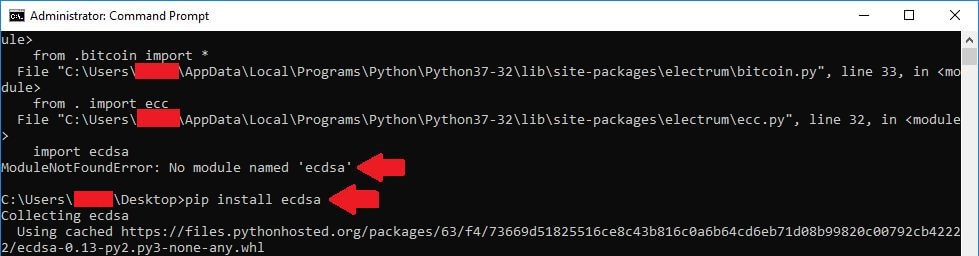
If you get error messages on modules not being found, simply type in pip install and hit Enter. For example in the screenshot below ecdsa was missing. Thus, we typed in pip install ecdsa and then hit Enter.
Other modules you may have to install this way are as follows:
– dnspython
– jsonrpclib-pelix
– protobuf
– pyaes
– PySocks
– qdarkstyle
– qrcode
– requests
– typing